Quality Control Checklist for Ceramic Tiles From Bangladesh
A numbered QC checklist for ceramic tiles from Bangladesh: absorption group, shade and caliber, dimensions and warpage, glaze defects, edges and breakage, lab tests for absorption, strength and wear, and carton and pallet packing checks, with fixes for common failures.
Short answer
Use this checklist to check ceramic tiles from Bangladesh before shipment: confirm the absorption group, shade and caliber, measure length, width, thickness, diagonals and warpage, inspect glaze for pinholes and crazing, check edges and breakage per carton, request lab evidence for water absorption, breaking strength and wear class, and verify carton stickers, separators and pallet build. Agree all tolerances, test methods and acceptance numbers in the purchase order first.

On this page
Key takeaways
Agree the absorption group, shade and caliber rules, tolerances, test methods and acceptance numbers in the purchase order before inspection, and draw the sample at random across cartons.
Judge tiles as installed: dry-lay a panel from different cartons to check shade, pattern alignment and joint rhythm, and measure warpage with a feeler gauge on a flat surface.
Treat glaze faults as lot evidence, not single-tile marks: crazing, pinholes and crawling point to a firing batch that needs lab confirmation or segregation.
Match the lab list to the room: water absorption and breaking strength for every tile, wear class for floors, frost and thermal shock for exterior and wet areas, and a named slip figure for wet floors.
If you buy ceramic tiles from Bangladesh, use this checklist before the shipment leaves the factory. Tiles fail in ways a general goods check misses: a warped tile rocks on the floor, a shade change shows across a wall, and a low wear rating wears through in a busy corridor. The failure often shows only after laying, when replacement means breaking out finished work.
Use an agreed sampling plan, not pieces the supplier selects. ISO 2859-1 specifies sampling schemes indexed by acceptance quality limit (AQL) for inspection by attributes.1 Write every tolerance, test method and acceptance number into the purchase order, and judge the lot against those agreed figures.
Why this checklist matters
Tiles are judged after installation, not in the carton. Dimensions decide whether joints stay even, flatness decides whether edges sit level, and glaze decides whether the surface survives cleaning. One carton of the wrong shade or caliber can break a whole room: tiles from different firings do not blend once laid.
ISO 13006 defines ceramic tiles by method of manufacture and water absorption, and sets characteristics and marking requirements for first-quality tiles.2 That classification starts the check: it tells you whether the tile is a low-absorption porcelain body, a medium-absorption stoneware body or a high-absorption wall tile, and which tests apply.
Each point below is checked against the approved sample, the specification and the lab report, and recorded as pass, fail or not applicable. Record actual values, not ticks alone.
Before you start
Do not begin until the references are complete: an approved sample per size, color and finish, the purchase order and specification, the absorption group and use per tile type, the shade and caliber rule, the test list per market, and the packing specification. Agree the sampling plan in advance,1 and draw the sample at random across sizes, colors, shades, calibers and cartons.
Confirm the tile identity first. ISO 13006 divides ceramic tiles by manufacture, extruded or dry-pressed, and by water absorption: low at or below 3 percent, medium above 3 percent up to 10 percent, and high above 10 percent.2 A fully vitrified porcelain tile is defined in the same standard as a tile with water absorption of 0.5 percent or less, belonging to groups AIa or BIa.2 Ask the supplier to state the group, work size and finish.
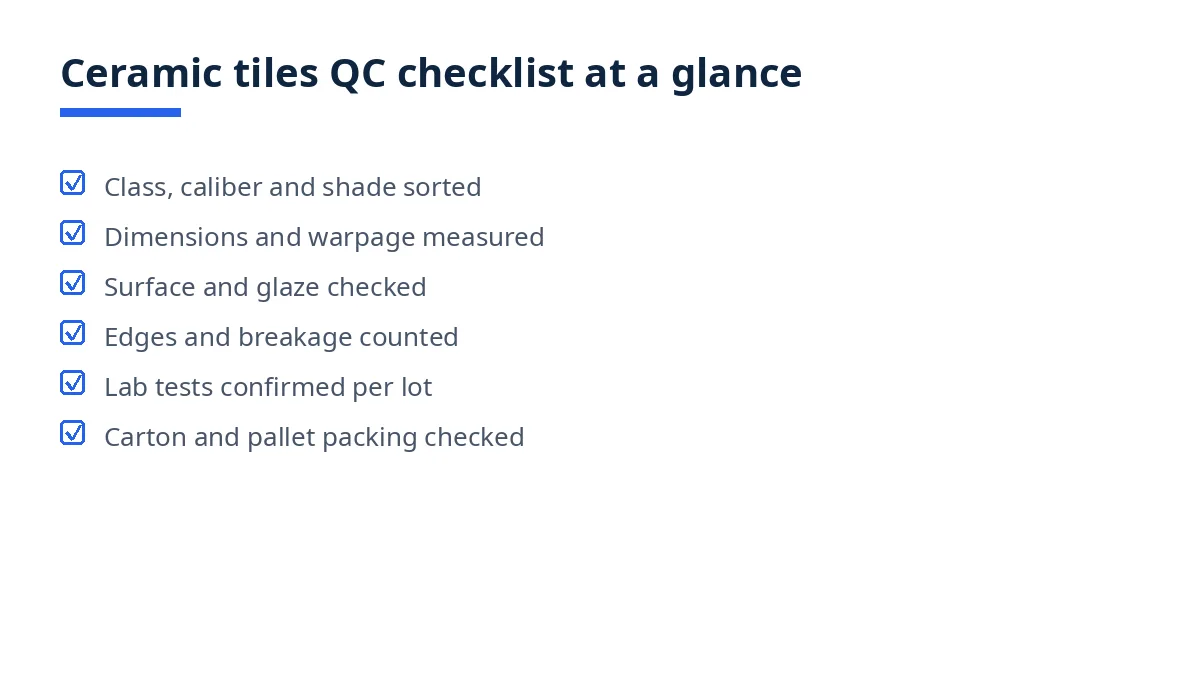
The full checklist (numbered, printable)
Identity, class, shade and caliber
Check carton marking: type, size, color, finish, shade, caliber, batch, quantity.
Check the absorption group matches the intended use: low absorption for wet and exterior floors, high absorption for interior dry walls only.2
Sort sampled tiles by shade under the same light. Every sampled carton must carry one shade number; visible differences within one shade number are a failure.
Check caliber by measuring length and width across cartons. One caliber must sit within the agreed band, so joints stay even when cartons mix.
Lay a dry-lay panel from different cartons at the specified joint width, and judge shade, pattern and joint rhythm as the installer will see them.
For patterned, veined or book-matched tiles, check print alignment and vein continuity across the panel, and the laying direction marking where required.
Dimensions, rectification and warpage
Measure length, width and thickness with calipers. Record actual values against the work size and tolerance.
Check edge straightness and rectangularity: measure both diagonals, since unequal diagonals will not form square joints.3
Check flatness: rest each tile face up on a flat surface and measure lift at center, edges and corners with a feeler gauge.4
Check edge warpage the same way. Record center warpage, edge warpage and corner lift separately.
For rectified tiles, confirm the edges were ground after firing and meet the tighter tolerances agreed in the order.2
Check thickness variation within and across cartons: a thick tile beside a thin tile leaves a lip.
Surface, glaze and print
Examine each sampled tile under strong, even light, face and edges, for chips, cracks, scratches, pinholes, blisters, crawling, bare patches and inclusions.5
Check for crazing, the fine crack network in the glaze, viewed at an angle under strong light. Crazing resistance is tested by ISO 10545-11.3
Check gloss and finish against the approved sample: polished, matt, structured and glazed finishes must match, with even gloss across tiles.5
Check printed decoration for blur, misregistration and color drift against the sample, especially on large-format and veined designs.
Check tile backs for clean pressing, even back feet where fitted, and no loose dust or broken ribs weakening adhesive bond.
Record any stain, oil mark or packing mark that survives normal cleaning as a surface failure.
Edges, corners and breakage
Check every sampled edge and corner by hand and eye for chips, nicks and crushed corners, the damage most often caused in handling.5
Check rectified edges are straight, sharp and chip-free along their full length: a chipped rectified edge cannot be hidden by a wide joint.
Count breakage per carton, to show whether damage is spread across the lot or concentrated in a few cartons.
Check for hairline body cracks by tapping and viewing, and set aside cracked tiles for lab confirmation.
Performance tests to request
Request water absorption evidence by ISO 10545-3, checked against the stated absorption group.3
Request breaking strength and modulus of rupture evidence by ISO 10545-4, checked against the agreed figure for tile size and use.3
For glazed floor tiles, request surface abrasion evidence by ISO 10545-7, with the wear class matched to the room traffic level. One published test-method summary lists ISO 10545-7 as the surface abrasion method for glazed floor tiles.6
For unglazed floor tiles, request deep abrasion evidence by ISO 10545-6 instead, since the method in item 25 applies to glazed tiles.3
For exterior and wet-area tiles, request frost resistance by ISO 10545-12 and thermal shock by ISO 10545-9, where the climate requires them.3
Request stain resistance by ISO 10545-14 and chemical resistance by ISO 10545-13 for kitchens, commercial floors and pool surrounds.3
For wet floors, confirm the slip figure and test method named in the order: slip ratings differ by market, and no single figure applies everywhere. A wet-area tile with no agreed slip rating is incomplete, not passed.
Confirm every lab report names the tile type, size, color, batch and lot tested, dated inside the production run shipped.
Carton, marking and pallet packing
Count pieces per carton and cartons per pallet against the packing list, and check the area per carton against tile size and count.
Check shade, caliber and batch stickers on each carton match the tiles inside: a wrong sticker sends the wrong tiles to the installer.5
Check separators are present where specified, so glazed faces do not rub and scratch.5
Check carton strength and closure: cartons must stay closed and square when lifted, with no crushed corners exposing edges.
Check pallet build: cartons stacked square, strapped firmly, edge protection where specified, no overhang inviting damage.
Weigh and measure sampled cartons and pallets, and check markings, pallet count and loading plan against the packing list before loading.
Common failures and how to fix them
The most frequent failure is shade variation across a wall, usually because cartons of more than one shade number were mixed at packing. Stop, re-sort by shade number, re-check the dry-lay panel, and only then release cartons in shade order. Next is warpage showing as lippage at the joint: re-measure a fresh sample across cartons, and segregate the warped caliber.
Crazing usually points to a glaze and body mismatch or to cooling that was too fast, and it cannot be fixed by cleaning or resealing. Hold the batch for lab confirmation under ISO 10545-11,3 and do not ship it as first quality on appearance alone. Pinholes and glaze crawling point to glaze or firing faults: re-inspect that firing batch as its own group before deciding on sorting or rejection.
Chipped edges concentrated in a few cartons point to packing or handling, not to the tile body: re-pack those cartons with separators and edge protection, and re-count breakage after re-packing. A wrong wear class, or a missing slip figure for a wet floor, is a specification failure: correct it and re-test before shipment.
Above the agreed acceptance level, options are re-inspection after sorting or rework, documented partial acceptance, or rejection. Record the decision, evidence and lot numbers.
Downloadable template / summary table
Copy the checklist into your inspection sheet, add tolerances and acceptance numbers, and record a result per lot.
Section | Checks | Evidence |
|---|---|---|
Identity and shade | Group, shade, caliber, dry-lay panel | Carton marking, photos |
Dimensions | Length, width, thickness, diagonals, flatness | Caliper and gauge values |
Surface and glaze | Pinholes, crazing, gloss, print | Light-box check, photos |
Edges and breakage | Chips, corners, cracks | Count per carton |
Lab tests | Absorption, strength, wear, frost, stain | Lot reports |
Packing | Count, stickers, separators, pallets | Packing list check |
How Exportain helps
Exportain is a B2B marketplace connecting buyers with Bangladeshi suppliers of ceramic tiles, so the specification behind this checklist can be agreed at the enquiry stage. Use inspection services when you plan the check, and read the AQL acceptance quality limit explainer before agreeing sampling figures. Exportain is not a party to the goods contract and does not inspect goods itself.
FAQs
When should this checklist be used?
Use it at final inspection, when goods are finished, sorted and largely packed. For larger and first orders, also use it during production, while shade and caliber can still be corrected.
Who should complete it?
The buyer, a local agent or an independent inspector can complete it, using the approved sample, the specification, a random sample and the lot lab reports.
What are the most common failures?
Shade variation, warpage and lippage, glaze pinholes and crazing, chipped edges and wrong carton stickers are the failures found most often, followed by a wear class or slip figure that does not match the room.
Can a third party do it?
Yes, if you share the approved references, tolerances, test list and acceptance levels first, and if the inspector draws the sample at random from finished cartons.
Next steps on Exportain
Before production starts, agree your tile group, work sizes, tolerances, shade and caliber rules, test list and carton marking, then read the AQL acceptance quality limit explainer and the pre-shipment inspection guide, and plan the check with inspection services.
Sources
- ISO 2859-1:1999 - Sampling procedures for inspection by attributes — Part 1: Sampling schemes indexed by acceptance quality limit (AQL) for lot-by-lot inspection. International Organization for Standardization (accessed )
- ISO 13006:2012 - Ceramic tiles — Definitions, classification, characteristics and marking. International Organization for Standardization, (accessed )
- ISO 10545 Ceramic Tiles. Eurolab (accessed )
- Ceramic Tile Inspection Process: 14-Step Case Study. VIS Global (accessed )
- Common Tile Defects and How to Detect Them | AQS QC Experts. Asian Quality Services (accessed )
- Tiles Testing Methods: Exploring ISO Standards for Precision and Durability. Ramirro (accessed )
- pre-shipment inspection
- quality control
- buyer guide
- importing from Bangladesh
- Bangladesh sourcing
- aql inspection
About the author
Sourcing from Bangladesh?
Post a request for quotation and suppliers on Exportain can send you their quotes directly.
Post an RFQ